Puppet's services: OpenVox agent on Windows systems
OpenVox agent is the application that manages configurations on nodes. It requires an OpenVox Server server to fetch configuration catalogs from. (For more info, see Overview of Puppet’s Architecture.)
For details about invoking the OpenVox agent command, see the puppet agent man page.
OpenVox agent’s run environment
OpenVox agent runs as a specific user, (defaulting to LocalSystem) and initiates outbound connections on port 8140.
Ports
By default, Puppet’s HTTPS traffic uses port 8140. Your operating system and firewall must allow OpenVox agent to initiate outbound connections on this port.
If you want to use a non-default port, change the masterport setting on all agent nodes, and ensure that you’ve changed your OpenVox Server’s port as well.
User
By default, OpenVox agent runs as the LocalSystem user. This lets it manage the configuration of the entire system, but prevents it from accessing files on UNC shares.
Puppet can also run as a different user. You can change the user in the Service Control Manager (SCM). To start the SCM, from the Start menu choose “Run…” and type Services.msc.
You can also specify a different user when installing Puppet. To do this, install via the command line and specify the required MSI properties (PUPPET_AGENT_ACCOUNT_USER, PUPPET_AGENT_ACCOUNT_PASSWORD, and PUPPET_AGENT_ACCOUNT_DOMAIN).
OpenVox agent’s user can be a local or domain user. If this user isn’t already a local administrator, the Puppet installer adds it to the Administrators group. The installer also grants Logon as Service to the user.
Managing systems with OpenVox agent
In a normal Puppet configuration, every node periodically does configuration runs to revert unwanted changes and to pick up recent updates.
On Windows nodes, there are two main ways to do this:
- Run OpenVox agent as a service. The easiest method. The OpenVox agent service does configuration runs at a set interval, which can be configured.
- Only run OpenVox agent on demand. You can use an orchestration tool such as Choria to trigger runs on demand across many nodes.
Since the Windows version of the OpenVox agent service is much simpler than the *nix version, there’s no real performance to be gained by running Puppet as a scheduled task, but if you do want scheduled configuration runs, use the Windows service.
Running OpenVox agent as a service
By default, the Puppet installer configures OpenVox agent to run as a Windows service and automatically starts it. No further action is needed. OpenVox agent does configuration runs at a set interval.
Configuring the run interval
The OpenVox agent service defaults to doing a configuration run every 30 minutes. If you don’t need an aggressive schedule of configuration runs, a longer run interval lets your OpenVox Server servers handle many more agent nodes.
You can configure this with the runinterval setting in puppet.conf:
# C:\ProgramData\PuppetLabs\puppet\etc\puppet.conf
[agent]
  runinterval = 2h
Once the run interval has been changed, the service sticks to the prior schedule for the next run and then switches to the new run interval for subsequent runs.
Configuring the service start up type
The OpenVox agent service defaults to starting automatically. If you’d rather start it manually or disable it, you can configure this during installation.
To do this, install via the command line and specify the PUPPET_AGENT_STARTUP_MODE MSI property.
You can also configure this after installation with the Service Control Manager (SCM). To start the SCM, choose “Run…” from the Start menu and type Services.msc.
You can also configure agent service with the sc.exe command. To prevent the service from starting on boot:
C:\>sc config puppet start= demand
[SC] ChangeServiceConfig SUCCESS
Important: The space after
start=is mandatory! Also note that this must be run in cmd.exe; this command won’t work from PowerShell.
To restart the service:
C:\>sc stop puppet
C:\>sc start puppet
To change the arguments used when triggering an OpenVox agent run (this example changes the level of detail that gets written to the Event Log):
C:\>sc start puppet --debug --logdest eventlog
Running OpenVox agent on demand
Some sites prefer to only run OpenVox agent on demand; others occasionally need to do an on-demand run.
OpenVox agent runs can be started locally while logged in to the target system, or remotely via an orchestration tool.
While logged in to the target system
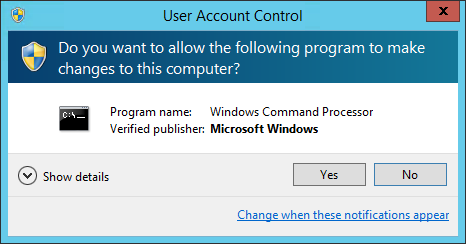
On Windows, you can start a configuration run with the “Run Puppet Agent” Start menu item. This shows the status of the run in a command prompt window.
You must be logged in as an administrator to do this. On Windows 7/2008 and later, Windows asks for User Account Control confirmation when you start a configuration run:
Running other Puppet commands
If you want to run other Puppet-related commands, you must start a command prompt with administrative privileges. (You can do so with either the standard cmd.exe program, or the “Start Command Prompt with Puppet” Start menu item added by the Puppet installer.)
To do this, right-click the start menu item and choose “Run as administrator:”
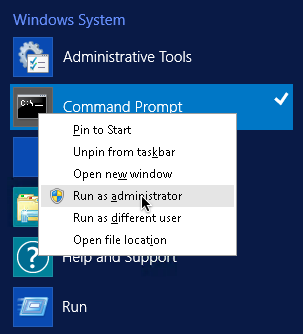
This prompts it to ask for UAC confirmation:
Remotely
Choria is the community-supported successor to MCollective and supports triggering OpenVox agent runs across a fleet of nodes, including Windows.
Disabling and re-enabling Puppet runs
Whether you’re troubleshooting errors, working in a maintenance window, or simply developing in a sandbox environment, you may need to temporarily disable the OpenVox agent from running.
- Start a command prompt with elevated privileges.
-
Run one of these commands, depending on whether you want to disable or re-enable the agent:
- Disable –
puppet agent --disable "<MESSAGE>" - Enable –
puppet agent --enable
- Disable –
Configuring OpenVox agent on Windows
The OpenVox agent comes with a default configuration that may not be the most convenient for you.
Configure OpenVox agent with puppet.conf, using the [agent] and/or [main] section. For notes on which settings are most relevant to OpenVox agent, see the short list of important settings.
Logging for OpenVox agent on Windows systems
When running as a service, OpenVox agent logs messages to the Windows Event Log. You can view its logs by browsing the Event Viewer. (Control Panel → System and Security → Administrative Tools → Event Viewer)
By default, Puppet logs to the Application event log, but optionally, Puppet may be configured to log to a separate Puppet log instead. To enable the Puppet log, create the requisite registry key with the reg.exe tool:
C:\> reg add HKLM\System\CurrentControlSet\Services\EventLog\Puppet\Puppet /v EventMessageFile /t REG_EXPAND_SZ /d "C:\Program Files\Puppet Labs\Puppet\bin\puppetres.dll"
Alternatively, the PowerShell cmdlet New-EventLog will do the same thing:
PS C:\> New-EventLog -Source Puppet -LogName Puppet -MessageResource "C:\Program Files\Puppet Labs\Puppet\bin\puppetres.dll"
For existing agents, these commands can be placed in an exec resource to configure agents going forward. Note that any previously recorded event log messages will not be moved; only new messages will be recorded in the newly created Puppet log.
You can adjust how verbose the logs are with the log_level setting, which defaults to notice.
When running in the foreground with the --verbose, --debug, or --test options, OpenVox agent logs directly to the terminal.
When started with the --logdest <FILE> option, OpenVox agent logs to the file specified by <FILE>.
Reporting for OpenVox agent on Windows systems
In addition to local logging, OpenVox agent submits a report to the OpenVox Server after each run. (This can be disabled by setting report = false in puppet.conf.)
Setting Puppet Agent CPU priority
When CPU usage is high, try lowering the priority of the Puppet Agent service. This can be achieved using the process priority setting, a cross platform configuration option. This can also be set in the OpenVox Server.